Tuesday, March 27, 2007

Ugly bug 2

Does Blogger only allow 4 photos per post from Picasa? Here are two more of the ugly bug - the top one not so clear but it kind of shows how bendy he is, trying to climb up the glass. In the bottom one his long front antenna is folded up!
 Posted by Picasa

UGLY BUG

What is this disgusting bug I found in our spare room?


 Posted by Picasa

Saturday, March 24, 2007

Fiber Trends Felted Clogs - Finished!

These took a lot longer to felt than I expected! The pattern said 10-30 minutes and they took the full 30 minutes, if not more. I kept pulling them out to try them on and it was very tricky because the water was HOT!
Here is a view looking down. You can see how stiff they are and how well they hold the shape! You can also kind of tell that the felt is slightly "textured". Knitpicks Wool of the Andes does this also, but I don't remember Brown Sheep Lamb's Pride doing it. I will have to investigate this phenomenon more thoroughly in the future.
A much better fit, post-felting!

After wearing them around the house a bit, I am definitely going to add something to the sole - either black puff paint or leather soles - because they are very slippery on tile/linoleum.
I also think they could have been ever so slightly smaller, too - they are stretching out a bit with wear. But, I will be wearing them over thicker socks at the ski cabin so I will leave them as they are for the time being. I have enough yarn for another pair for the house, so I just might make those a size smaller. Posted by Picasa

Fiber Trends Felted Clogs

Here are my finished, pre-felted Fiber Trends clogs (with a pair of baby mitts for size). I used Patons Classic Wool, held doubled, in Wedgewood and Black. I actually quite liked the yarn - it's nothing special but certainly not horrible. I got it on sale so these slippers cost me less than $13. I used nearly two skeins of the Black, and nearly one skein of the Wedgewood.
That is my foot sticking out of the clog, to give you some idea of how big it is! The sole is double-thick. The weird color pattern you can see where the Wedgewood meets the Black sole is where the increases happen. I have to admit at such a loose gauge, with yarn held doubled, it was kind of tricky keeping track of it all!
Here is the bottom of the sole. It is worked in one long piece, and then seamed together down the middle.
I messed up a little bit with the "bumper" on one of the soles - I worked it the wrong way (going up instead of going down). I decided I didn't care enough to re-do it (I hate picking up stitches!) so I left it. You can see here how the bottom of the left slipper doesn't look as "finished".. oh well! Posted by Picasa

Monday, March 19, 2007

Broadstreet Mittens

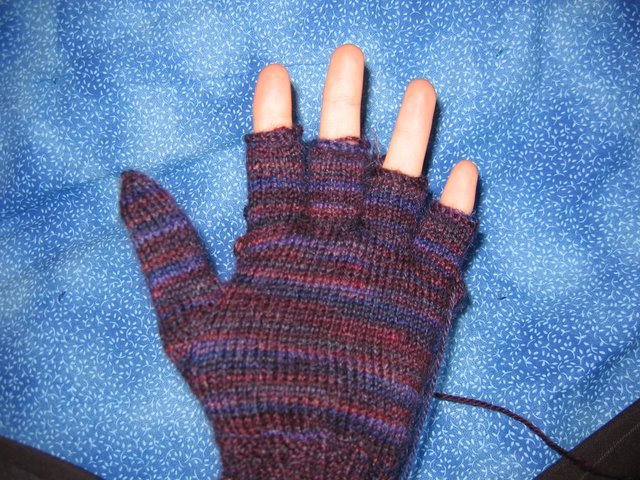
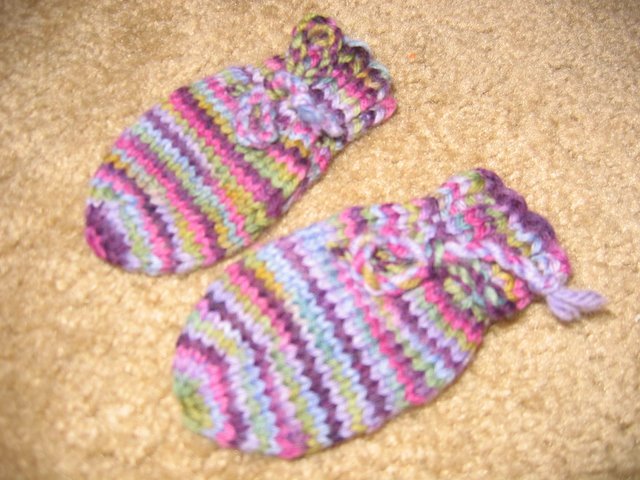
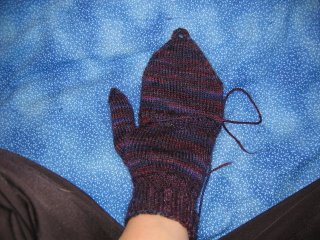
I have finished one and am halfway through a second of a pair of Broadstreet Mittens from knitty.com. I love these! The yarn is something luscious which is slipping my mind at the moment, in a gorgeous rich colorway of burgundies and purples and navies.

Anyway, I am mostly very happy with these - except with the flap top. I did a sock toe with paired decreases at either side, but in retrospect I think it makes the tip too pointy. I think I am going to undo the decreases and redo it with 5-6 decreases around.

The main thing I don't like is how far down the top comes when it is pulled over. I'm supposed to sew on a little button for the flap to hook on to, but it would have to fall halfway down the ribbing to be in the right place and that just seems wrong to me. I think a slightly less pointed flap would help.
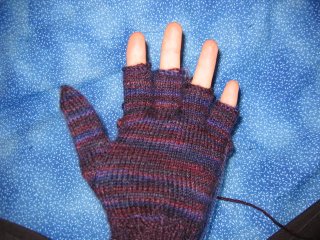
I can't help but think to myself that it looks funny with a full thumb - and wonder if there is a way to put a little flap on the thumb as well. Of course there is a way, but I think it would make it too bulky and really just be silly. The thought is there, though!
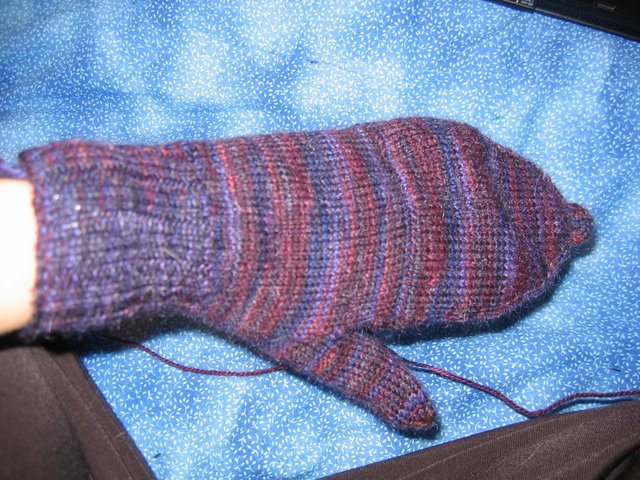
From this angle, I quite like the appearance of the flap - it looks a bit more rounded and gentler, and I think that's what I need.
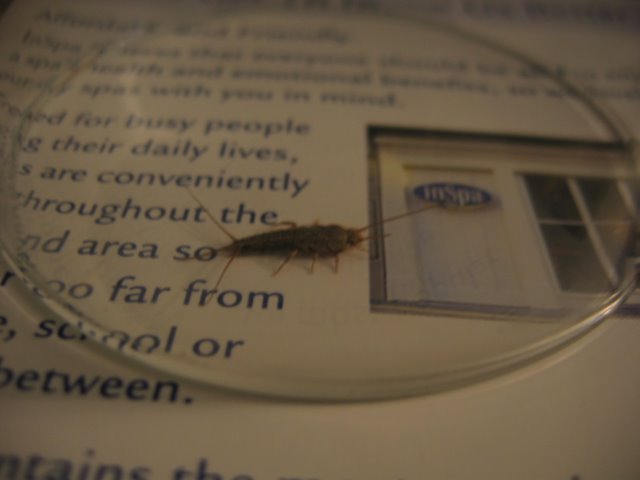
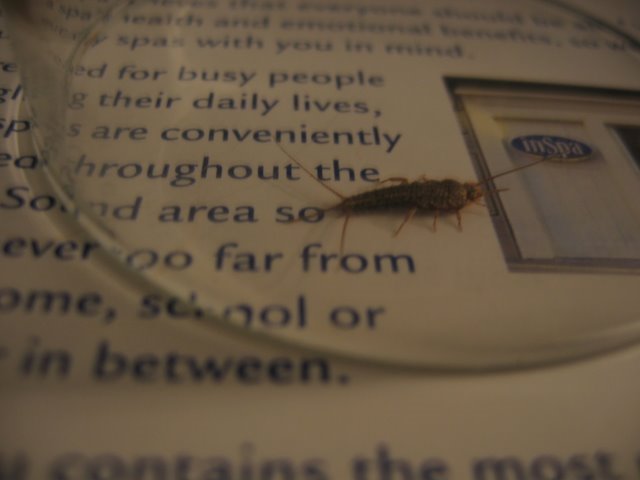
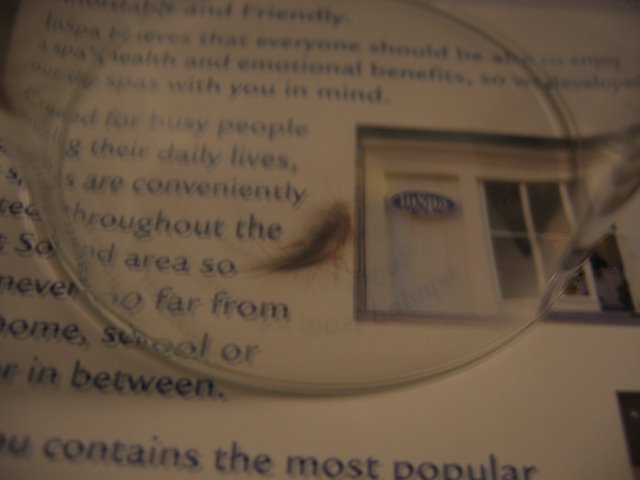
 Posted by Picasa

Mason-Dixon Knitting Baby Kimono

Here's the MDK Baby Kimono, in a gorgeous yarn from my IrishBabyKnits Yarn of the Month club subscription. The colorway is Shirlie, I am completely blanking on the yarn though - I think it may be "Gretel", a wool/alpaca blend. I really love the yarn but of course I only get one skein of it so sometimes it can be tricky to decide what to do with it! The pattern calls for garter stitch originally but I went with stockinette because I thought garter would be too busy with this colorway.

I haven't sewn the seams yet, I'm still deciding whether this is the right pattern for the yarn or not! I am a little weirded out by the sizing but I hope once I seam it, it will look right. I remember reading somewhere that for baby sweaters the arms should be as long as the body, which is just about right as you can see here.

This was originally intended for a coworker's baby shower. She doesn't know yet if it is a boy or a girl, and I thought the blue/green colors would be gender neutral enough - but I have had several people tell me that the wrap style is "girlie", so now I'm not sure what I'm going to do. We'll see :) Posted by Picasa

Sunday, March 18, 2007

Calorimetries

I made this Calorimetry (from Knitty.com) for my mom to wear when she is out shoveling or doing other things in the cold New England winters. It will fit under a larger hat for extra warmth or work on its own when it isn't that cold out. The yarn is 100purewool, and I *love* it. It's a single-ply which I am not usually a fan of but this yarn is so soft and gorgeous I cannot resist. I still have a bit left and I am hoarding it, trying to decide what to do with it. It's really lovely.
The pattern calls for it to be closed with a button, but I don't like buttons, so I didn't do one. Instead, I made a twisted cord to be used as a tie. The pattern also calls for the short rows to be done in a manner which I consider to be incorrect, which leaves little holes behind. I dislike holes, so I did them properly with the exception of the first two which I used for the cord to thread through. Mom really likes it!

Here's another Calorimetry, using the gorgeous hand-dyed yarn that I used for Amelia's mitts (see previous post). Between Calorimetry and the mitts, I used all of the yarn that I had, with just enough left over to make one baby sock. Does anyone know a one-footed baby? I think I'm going to try the local hospital to see if they can use it.

This is what Calorimetry looks like when worn. I might actually have to make one for myself! It functions as a headband *and* earwarmer all in one, which is pretty nifty. It's also really soft and flexible, unlike most lycra/fabric headbands.

 Posted by Picasa

Mitts for Amelia

I made these mitts for a friend to try out for her baby, who likes to suck her thumb. You can't tell in these photos, but each mitt has a little slit on the side where she can poke her thumb out and suck on it. I tried to make the hole big enough that the thumb and the part of the hand where the thumb branches out will both fit through the hole, so she doesn't end up sucking the mitt, but I'm not positive I managed. They are just 2x2 rib for the cuff and then worked plain for a bit before decreasing at the top. There's an eyelet row too that I threaded a twisted cord through to help the mitts stay on.
The yarn is Cascade 220, dyed by some WAHM - I got a bit of the yarn (half a skein?) as part of a trade recently and what better use to put it to than this! It's so pretty, I wish I could get more of it, but I have no idea who dyed it.

For the future, I think I would modify the pattern ever so slightly by starting out with fewer rib stitches and increasing for the mitt. I would also do the right number of stitches to do 5-6 decreases at the top instead of 4. Overall, for a made-up pattern, I think this is just fine.

I'm still waiting to see if they actually fit/function, though! Posted by Picasa

Cabled Hat

My boyfriend recently lost his favorite winter hat, just before a trip to NYC. He requested a new hat, with some "texture" which I finally realised translated to cables. He also wanted a dark/charcoal grey. My LYS didn't carry Cascade 220 (my hat yarn of choice) in a dark enough grey so I went with this Berocco Ultra Alpaca in this gorgeous color - I believe it is "Charcoal Mix". This yarn is oh-so-yummy to work with but slightly thinner than Cascade 220. The halo helps it look like a nice firm fabric however. I eventually settled on a simple ropey cable that always crosses on top. It's a 6 stitch cable and I originally started with a 3 stitch purl section separating each cable. After my first cable twist I realised this would make the hat too big, so I decreased the purl section to two stitches. This means the hat fits nice and snug for the most part but it's a little bit looser at the bottom. If I hadn't been on a tight deadline, and hadn't already tried about four different stitch patterns, I might have started over again and worked the whole thing with a 2 stitch purl section, but alas - I was lazy. I was worried about the dark yarn hiding the cables but ultimately, I think it worked out quite nicely. I did some decreases at the top - first decreasing each of the three-stitch cable pieces to two, then decreasing the 2-stitch purl sections to 1, etc. I may try to take some better photos of the crown section and I may not - I also think I will write out the pattern more specifically so I have some hope of duplicating it in the future! Posted by Picasa